| NO DEVELOPMENT IN VISUAL STUDIO OR SHAREPOINT DESIGNER REQUIRED |
Hi dear SharePointies and SharePoints.
This will be a Quick way to get a familiar touch applied to your teamsites (and other sites as well)
(See also part two: A guide to quick SharePoint 2013 branding – part 2 – with Javascript)
| This guide has been verified in SharePoint Foundation 2013 as well as Server and Online, BIG thanks to Chuck Snyder and others for verifying functionality in SharePoint Foundation 2013. |
Some of you may already have tried some of the branding features built into SharePoint 2013 and SharePoint Online (2013), Microsoft have added some functionality that makes it easier for some and harder for some. I had branding in 2010 pretty much figured out and now to me it seems like they have given the box a good shake, everything is almost in the same place as before…but not quite…
I have noticed that most of the branding info that is out, most blogs and presentations have been about branding a publishing site, meaning an external website or intranet portal or similar, sites meant to be branded and customized. In this guide I will fokus on the teamsite, probably the most used site of them all…
I will show you step by step how to access some of the basics in branding your sites, no development yet…the tools needed for this exercise, is notepad.exe…that’s it…
In this short guide, I will use a site located in SharePoint Online (2013/Preview, link at the end), but the steps are exactly the same in an onprem environment.
| For the permanent production branding, I have to recommend using Visual Studio to create a wsp package, as long as you add the same files as I do here it will work the same. That way you will have an installable package that can be reinstalled and used in test and dev environment. You can also make sure the package works Before moving it into production. |
We will make this:
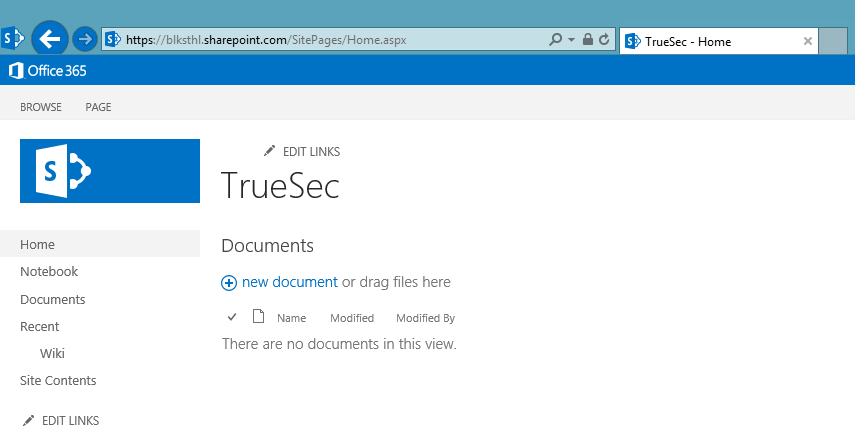
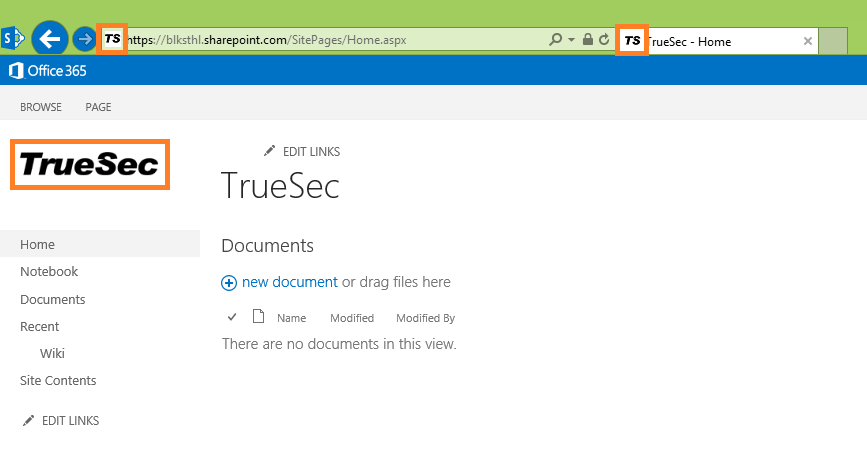
Look like this:

Now let’s get on with it:
Create a new site collection and work with the rootsite.
Having a brand-new unbranded, untouched team site, I will start by getting the files to start working with, we need a new MasterPage (.master) and a new StyleSheet (.css).
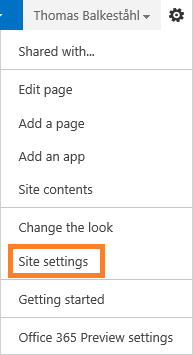
In the top right corner, click on the little cogwheel/gearwheel.

Then click on ‘Site settings’ in the dropdown.
Site Settings offers a lot of choices, we are only going to be using a few.

The branding features of SharePoint are mainly located in the ‘Web Designer Galleries’ and the ‘Look and Feel’ sections of site settings.


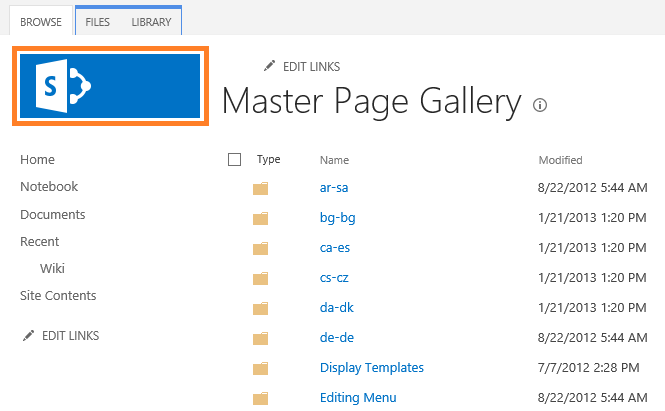
In Web Designer Galleries section, click on Master pages

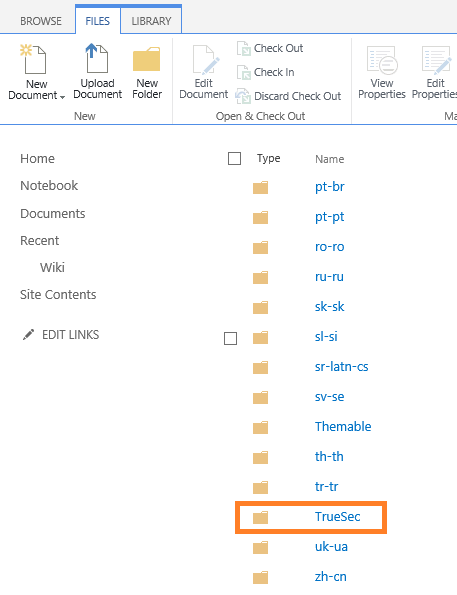
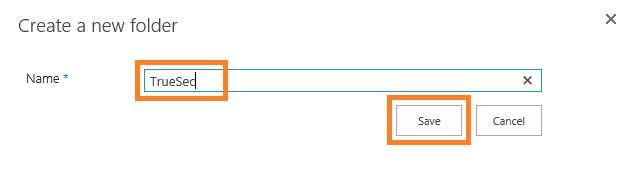
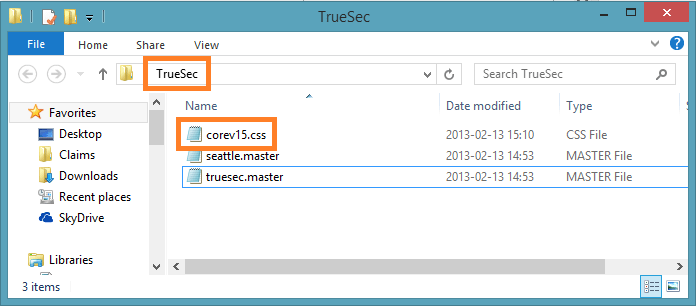
In here we will store the files we need, to make it a bit more structured, we will create a dedicated folder for our efforts only, I’ll call mine TrueSec.
In the ribbon section, click on the tab called FILES, then ‘New Folder’.

Type in the name and hit ‘Save’
The folders and files are in alphabetical order, so in my case using truesec, I have to go to the next page. Use the arrow at the bottom.


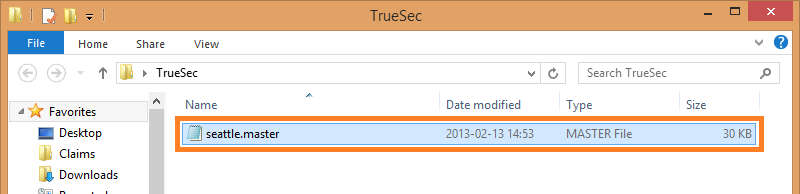
Ok, now we have a place to put our files, next, we download a copy of the default masterpage beeing used in a SharePoint 2013 team site, ‘Seattle.master’

Use the dropdown menu on the file

In the IE download bar, select the dropdown arrow and select ‘Save as’.

Save the file in a suitable location, I put mine in a folder on the desktop. Leave the filename as is.

Select ‘Open folder’


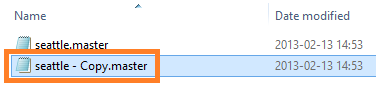
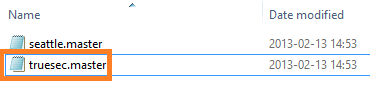
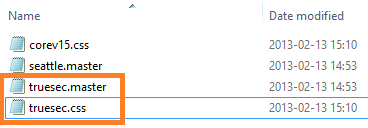
Next, we make a copy of the seattle.master and rename it to what we want. I’m going with truesec.master


Ok, now we have a local copy of the default masterpage called truesec.master. It is at this point still identical to the default and we’ll leave it that way for now.
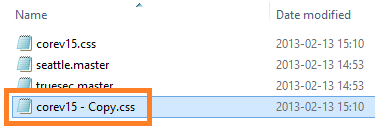
Now, we get a copy of the default stylesheet used in the seattle.master, called core15.css.
Go back to the browser with your site and masterpage gallery, click on the SharePoint logo.

Now, we are back in the root team site and its homepage, from here it is a simple task to download the stylesheet, since it is not located in the masterpage gallery, I’ll use a different method to get it.
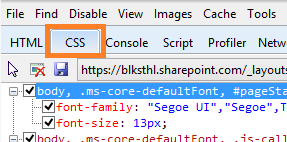
In your Internet Explorer browser, click on F12, this will bring up the F12-Developer toolbar, a great built in tool.

Click on the tab named ‘CSS’

Make sure that the path is selected, that points to the core15.css file

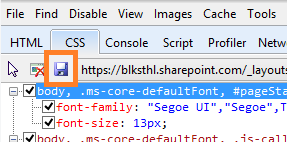
Then on the little ‘Save’ button

This method may result in a slightly ‘off’ css file (missing navigation in one occation), the reason is that the developer dashbord will save a rendered css file instead of the actual file.
In order to avoid any risk for that, type in the full path to the actual corev15.css file, then save it to disk. |
Place the file in the same folder locally on your computer as the seattle.master/truesec.master.
Same as before, make a copy and then rename it to truesec.css
|
A slightly more difficult but better way, is to create a new blank text file and rename it to ‘truesec.css’, then, add to this file only the ID’s and Classes that you want to style.
Adding only the classes/ID’s you want to edit the styles for, will save bandwidth and improve performance as well as keep the css file manageble.
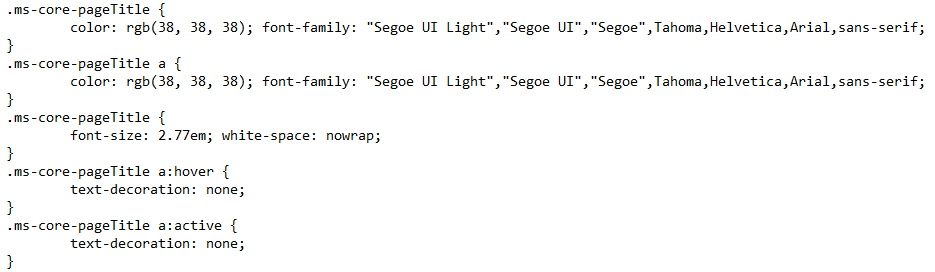
Example, say that you want to style the Page Title with a new font-size and color, add only this to the empty text file:
.ms-core-pageTitle
{
font-size:30pt;
color:rgb(255, 127, 39); /* blksthl orange */
}
(read the core15.css to get an idea of how it is built) |

Ok, now we have both the files needed to make the changes to the branding, but we do need two more things to make the branding a bit more interesting. Logos, I’ll show you how to replace the default logo (the big one) and the favicon (the smaller ones), the little thing in the address bar that is actually used for a few things and will affect the braded feel of the site pretty much.

I’m adding the files to my local folder to make it simple and keep it all in one place.
If you don’t already have a favicon for your organization, you can use any one of the free image to favicon sites available to create one from a image. I have used several and for example this works: http://favicon.htmlkit.com/favicon/.
This tool will also let you select the formats you want. |
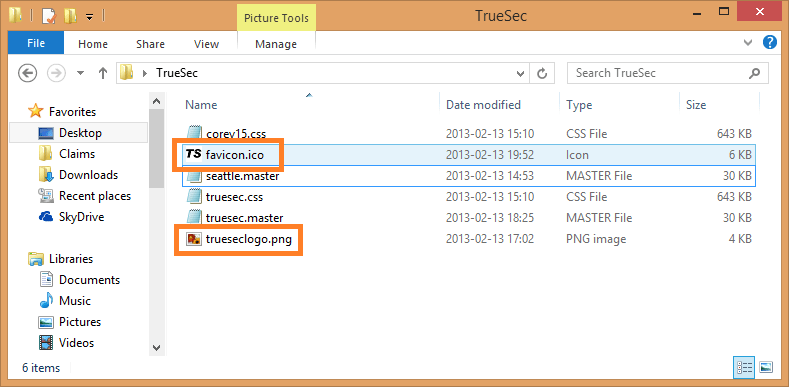
I have in my example a favicon file of dimension 32×32 with a color depth of 32. 16×16 works just as well.

The original ‘SharePoint‘ logo is 180×64 and as long as you stay close to that, the design will be ok.

Now, we will edit the files and add the simple magic lines….
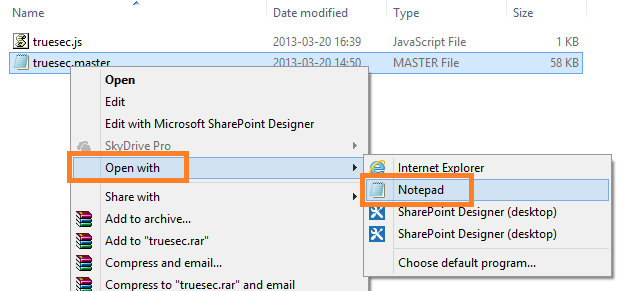
First, we want to load out custom StyleSheet, it’s not custom yet, but loading it will allow you to make modifications to it later. So, open up the copy of the master file, in my case the file named truesec.master
(Notice the filepaths, all pointing to the masterpage gallery catalog and our truesec folder)
Attention! If you copy and paste from the code below, you may have to replace the quotes and double-quotes with your own, do a replace in notepad. I have tried to replace them in the code samples but be aware.
The quotes if copied here is for some reason of a different format and will cause the code to fail if used as-is. Usually you will see that you get a left and right version of the quotes, they do not work. See example:

(This may differ depending on what text editor you are using) |
Locate the line:
(Use Notepad find and search for ‘corev15’)
<SharePoint:CssRegistration Name=”Themable/corev15.css” runat=”server”/>

Add directly below it as one line:
<SharePoint:CssRegistration name=”/_catalogs/masterpage/truesec/truesec.css” After=”corev15.css” runat=”server”/>
That will make:

Next we add our custom favicon, locate the line:
(Use Notepad find and search for ‘favicon’)
<SharePoint:SPShortcutIcon runat=”server” IconUrl=”/_layouts/15/images/favicon.ico?rev=23″ />
Change it to:
<SharePoint:SPShortcutIcon runat=”server” IconUrl=”/_catalogs/masterpage/truesec/favicon.ico” />

Next and last, we add the actual logo, locate the line below:
(Use Notepad find and search for ‘LogoImage’)
<SharePoint:SiteLogoImage CssClass=”ms-siteicon-img” name=”onetidHeadbnnr0″ id=”onetidHeadbnnr2″ LogoImageUrl=”/_layouts/15/images/siteIcon.png?rev=23″ runat=”server”/>
Edit or replace it to look like this:
<SharePoint:SiteLogoImage CssClass=”ms-siteicon-img” name=”onetidHeadbnnr0″ id=”onetidHeadbnnr2″ LogoImageUrl=”/_catalogs/masterpage/truesec/trueseclogo.png” runat=”server”/>
( Update: Added missing endtag /> )

There, the files are edited and if we upload and use these, we will have the logo and the favicon used in our site. We will at this point not touch the css.
| Warning! Make sure that you do not make any mistakes editing the masterpage, if you accidentally remove something you could end up with a site that is inaccessible, if you do, SharePoint designer can be used to correct the masterpage again |
(If you don’t plan to edit the css in the future, you can either skip loading it or at least clear the file of content, making it empty and quick to load.)
Upload the files in your local folder from the masterpage gallery, cogwheel, ‘Site settings’, ‘Master pages’. Browse to your folder, my ‘truesec’ folder.

In the upload dialog, browse to your files, add a comment if you like but make sure that the destination folder points to your folder (relative path).

In the second dialog, make sure that you for the masterpage, select ASP.NET Master Page, like in the picture below, for the other files including the css, select Content type ‘Design file’

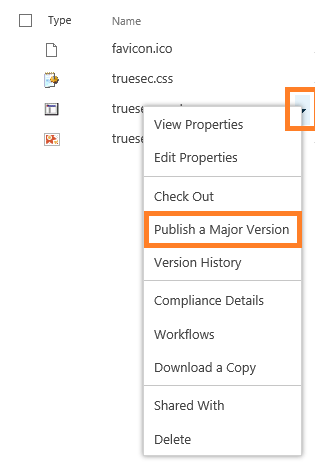
Ok, files uploaded, all ready to use…almost.
I have found that the master needs to be published as a major version before being accessible from the gui. Click on the dropdown arrow, then ‘Publish a Major Version’.
| Apparently, if the publishing site feature hasn’t been activated, the ‘Publish as a Major Version’ is missing, the workaround then is to check the file out, then check it back in and select major version. |
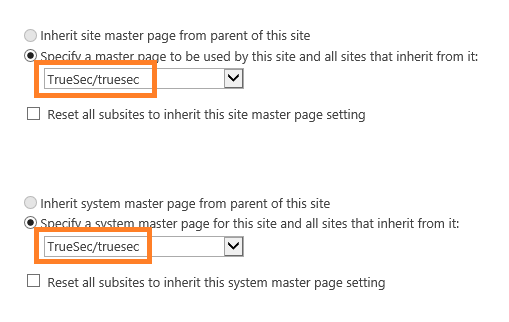
Now, we need to change the masterpage that is used…this is actually a part of the publishing features, but if you don’t have the site collection publishing feature and the site publishing feature activated, try using this direct link instead:
[URL to your team site]/_layouts/15/ChangeSiteMasterPage.aspx
The ‘Site Setting – Site Master Page Setting’ dialog seems to only be available if the site Collection feature, ‘SharePoint Server Publishing Feature’, has once been enabled. Try it, I enabled it, accessed the page, then disabled it again and I could still access it. (I don’t Think that is by design.)
Sometimes there is an error when clicking ok but the masterpage was still updated…this in onprem as well as online. |
For me it looks like:

Now, we change the masterpage used from this:

To this:

Click on OK in the bottom right corner.

Done, TADA!

(The green background comes from Windows 8s adaptive coloring based on the background image, my background Changes on a Schedule so IE will look different all the time)
If you also pin the Internet Explorer tab to the taskbar, you will also have it look like this:

Nice huh?
Try to make some light changes to the css file as well, start out small. Use F12 Developer Toolbar and the arrow function to point to an object and find out what styles are applied and from what id/class they are coming.
It’s easy:

Press F12, then use the arrow

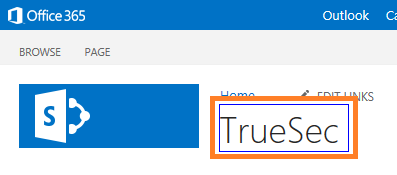
Click on an object, like the site title

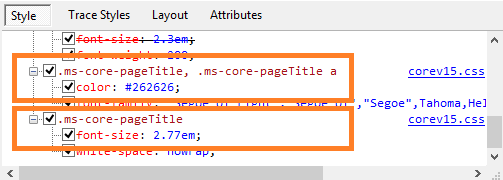
In the styles list you will now be able to find what gives the title its color and size:
.ms-core-pageTitle, .ms-corepageTitle a
and
.ms-core-pageTitle
Locate them in the local css, upload it and overwrite the old, reload the page, VOILA!

To continue, follow the next part of this SharePoint 2013 branding guide:
A guide to quick SharePoint 2013 branding – part 2 – with Javascript
This will allow you to use java to set the color and image of the top ‘chrome’. Even the Little buttons and toggles to the right. You will own them all.

References:
A great place to learn html and css
http://www.w3schools.com/
Great overall branding blogger
http://blog.drisgill.com/
Map a network drive to the SharePoint 2013 Master Page Gallery
http://msdn.microsoft.com/en-us/library/jj733519.aspx
How to: Convert an HTML file into a master page in SharePoint Server 2013
http://msdn.microsoft.com/en-us/library/jj822370.aspx
Starter Master Pages for SharePoint 2013 (more advanced branding)
http://startermasterpages.codeplex.com/
Office 365 Preview
http://www.microsoft.com/office/preview/en/office-365-enterprise

___________________________________________________________________________________________________
Enjoy!
Regards

Twitter | Technet Profile | LinkedIn


 _________________________________________________________