

| NO DEVELOPMENT IN VISUAL STUDIO OR SHAREPOINT DESIGNER REQUIRED |
This is revision 2 of the A guide to quick SharePoint 2013 branding – part 2 – with Javascript. A few of the javasnippets turned out to stop working if MDS, Minimal Download Strategy was in affect which made the branding miss the target. The lines of javacode in this revised post has been corrected and will now work just as well with MDS.
I have to send a BIG thank you to Anurag Yagnik for getting me on the right track and for verifying the functionality. THANKS!
Hi dear SharePointies and SharePoints.
Welcome to the revised part 2, the revised version has some changes and rather updating the original post, I’ll keep some history and get a new post out with slightly different content.
I assume that you have seen and followed part 1, A guide to quick SharePoint 2013 branding so I will not cover every step needed, some you will have to get from part 1.
This is for all of you SharePoint technicians and enthusiasts out there who are not developers or don’t really have time or feel like learning the new ‘Design Manager’. All of the steps here can be done using only a Windows client and appropriate permissions.
| This guide has been verified in SharePoint Online. If you have done the steps in Onpremise server and/or Foundation, please drop me a comment and I will add that here and also give you credit for it. |
In part 1, we added a custom masterpage, a css/stylesheet file, a favicon and a logo image. We configured SharePoint to use the custom masterpage and in that we referenced the custom css, the favicon and the logo. All good.
Now, we want to get rid of the annoying default blue ‘banner’ with the Office 365 logo(SPO), the SharePoint text (Onprem/Foundation).
Without using Visual Studio…or SharePoint Designer…

In this short guide, I will use a site located in SharePoint Online (2013/Preview, link at the end), but the steps are exactly the same in an onprem environment.
| For the permanent production branding, I have to recommend using Visual Studio to create a wsp package, as long as you add the same files as I do here it will work the same. That way you will have an installable package that can be reinstalled and used in test and dev environment. You can also make sure the package works Before moving it into production. |
We will in part 2, make this (pretty good):
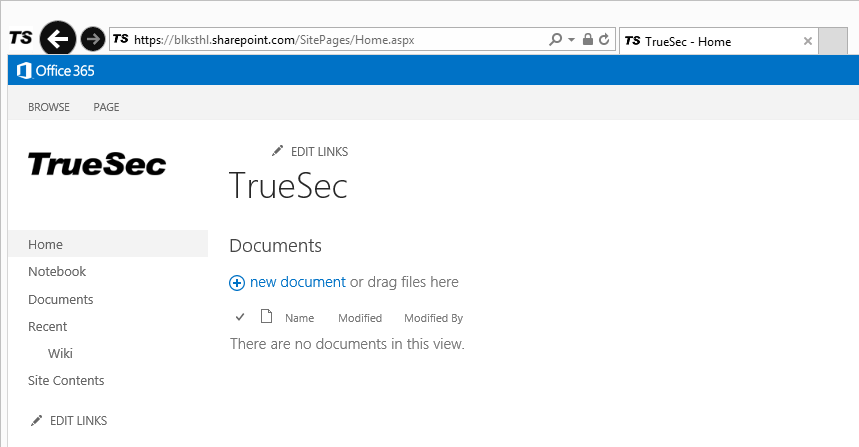
Look like this (even better):

In my opinion, a whole lot better!
Now let’s get on with branding our site:
Use the sitecollection you used before, or simply any site collection will do. Work with the rootsite as usual.
To do what I am going to do, we need two new and one modified file:
truesec.js – New (Contains all the actual JavaScript code)
TrueSec_transparent_white.png – New (New logo, White on transparent for a nice effect)
truesec.master – Old (only modified to load the JavaScript file)
I will start by creating a simple JavaScript file, use a local folder to store your files in, we will later upload them to SharePoint.


Yes, you want to change the extension.
I added this JavaScript lines to my truesec.js file, see inline comments to see what it does
_spBodyOnLoadFunctionNames.push(“myinit”);
function myinit()
{
// This function makes sure that the script is executed after the page has completed loading
ExecuteOrDelayUntilScriptLoaded(function () {
if (typeof asyncDeltaManager != “undefined”)
asyncDeltaManager.add_endRequest(ConfigureBrandingsuite);
else ConfigureBrandingsuite();
}, “sp.js”);
}
function ConfigureBrandingsuite()
{
// Thanks to Anurag Yagnik for the enhanced script
var v_icon, v_iconbox;
var v_suiteBarLeftm, v_ribbonbox;
var v_link;
// Replace the default logo with my own shiny white with transparant background, oh-yeah!
var v_newImageSrc=”../_catalogs/masterpage/truesec/TrueSec_transparent_white.png”;
// get link reference so that we can point to our website, replace with your own
v_link = document.getElementById(“suiteBrandingLink”);
v_link.href=”https://blog.blksthl.com“;
// get icon reference so that we can change properties
v_icon = document.getElementById(“suiteBrandingIcon”);
v_iconbox = document.getElementById(“suiteBrandingIconBox”);
v_suiteBarLeft = document.getElementById(“suiteBarLeft”);
v_ribbonbox = document.getElementById(“s4-ribbonrow”);
// customize icon, icon box, background color and title
// Setting the background of the entire suitebarleft to jet-black for maximum effect
v_suiteBarLeft .style.background = “#000000”;
// v_ribbonbox.style.display=”none”;
// Setting the width to a little more than default, else the image may be cropped
v_iconbox.style.width=”200px”;
v_icon.src = v_newImageSrc;
v_icon.style.width=”150px”;
v_icon.style.left=”0″;
v_icon.style.top=”0″;
v_icon.alt=”Go to My Portal”;
v_icon.title=”Go to My Portal”;
// site specific – hide logo since we already have on on top left now
//document.getElementById(“ctl00_onetidHeadbnnr2″).style.display=”none”;
return false;
}
Make sure that your quotes and double quotes are correct, copying from a webpage often result in misformatted quotes. Avoid this by reviewing the code thoroughly in notepad. The ‘wrong’ kind usually leans to one or the other direction, whilst the ‘correct’ kind are straight. Example: |

Ok, thats one out of three files, moving on to the masterpage.
This you may allready have stored locally, but if you don’t, download a copy from SharePoint. I’ll use my custom truesec.master from part 1.
In your SharePoint site collection root, select Site Settings, then ‘Web Designer Galleries/Master pages’


In the master page gallery, navigate to your custom folder, mine is named ‘TrueSec’ obviously…
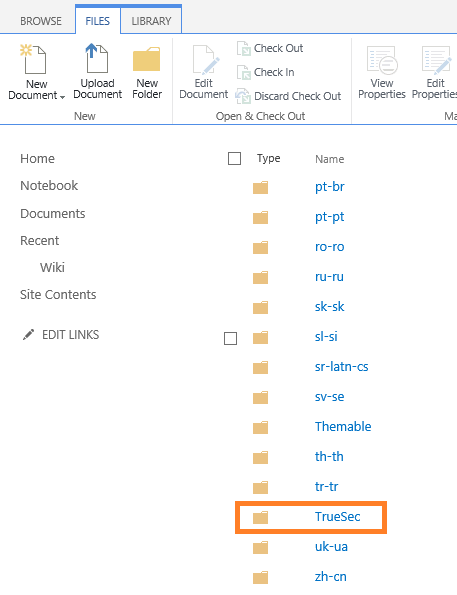
Open the custom branding folder and in it, locate you master page.
Select the file in the checkbox and click on ‘Download a Copy’.


Save the file to your local folder.

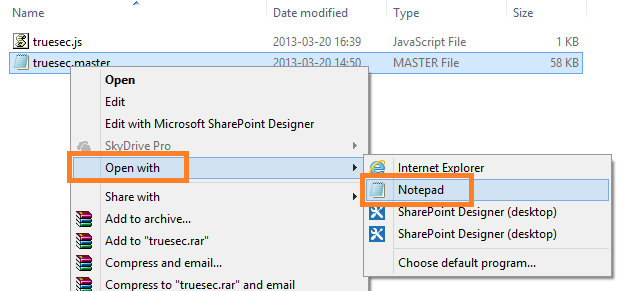
Now, we will add a simple line to the masterpage, right click on the masterpage and select edit in notepad.
Locate the following SharePoint:Scriptlinks:

After the line:
<SharePoint:ScriptLink language=”javascript” name=”suitelinks.js” OnDemand=”true” runat=”server” Localizable=”false” />
Add:
<SharePoint:ScriptLink ID=”ScriptLink1″ runat=”server” Defer=”False” Name=”~siteCollection/_catalogs/masterpage/TrueSec/truesec.js”></SharePoint:ScriptLink>
|
Make sure that your quotes and double quotes are correct, copying from a webpage often result in misformatted quotes. |
With the code added, that part of the masterpage will now look like this:
<SharePoint:ScriptLink language=”javascript” name=”sharing.js” OnDemand=”true” runat=”server” Localizable=”false” />
<SharePoint:ScriptLink language=”javascript” name=”suitelinks.js” OnDemand=”true” runat=”server” Localizable=”false” />
<SharePoint:ScriptLink ID=”ScriptLink1″ runat=”server” Defer=”False” Name=”~siteCollection/_catalogs/masterpage/TrueSec/truesec.js”></SharePoint:ScriptLink>
<SharePoint:CustomJSUrl runat=”server” /> <SharePoint:SoapDiscoveryLink runat=”server” />
or:

Save the file and leave it for now. We will upload all the files later.
So, two out of three done.
Time for the simplest one, the image. I wanted to add something a bit different than the logo I have already added, so I went with a logo in white on black instead of black on white. The image file is White on transparent and then the java script sets the background to jet-black which makes it all perfect. You use the images you want and for your customer/company/organization and make the decisions based on the colors you have there, I bet it will be beautiful!

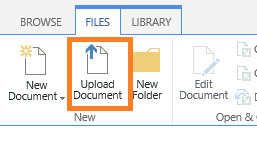
Ok, if you started out like I did with the ‘light branding’ already in Place, then you are pretty much done, all we need to do is upload the files and reload the page to see the result. Go to your site, open ‘Site settings’, ‘Master page’, browse to your folder, in my case its ‘/TrueSec’. Once here, select the ‘Files’ tab and ‘Upload Document’.
Now, if you already had the custom master selected in the site, it will load automatically with the JavaScript and all. Load the site in a browser to see the result:
If any of the branding does not show up, one good T-shooting step is to go to the MasterPage gallery again and the ‘truesec’ folder. In here, click on the dropdown for each file and make sure they are all published, if you get the option to ‘Publish a major version’ do it. That helps a lot of times when anything is wrong.
If anything is so wrong so that you can’t access any of the sites, use this link: [URL to your team site]/_layouts/15/ChangeSiteMasterPage.aspx, it will allow you to switch back to the ‘Seattle master’ and get access to the libraries and settings again. Make Changes, fix the problem, upload the new file and switch back to your custom master again to test.
Where to go from here?
In addition to the objects I have modified using java, there are several you can figure out how to configure for yourselves. If you want to find the objects, you can use F12 – Developer Toolbar that is built into IE.
Or, use any of these that are part of the 2013 default objects:
suiteBarLeft
suiteBarRight
suiteBrandingBox
DeltaSuiteLinks
suiteBarRight
RibbonContainer-TabRowRight
All og these have different properties to be configured, google, test, play around and find out what can be done.
References:
SharePoint 2013 Execute Javascript function after MDS load
http://blog.symprogress.com/2013/09/sharepoint-2013-execute-javascript-function-after-mds-load/
SharePoint 2013 Top links – Name, ID and How to Hide them (Excellent post on the objects and a start, how to hide them completely)
http://www.tuyrcorp.com/sharepoint-2013-top-links-name-id-and-how-to-hide-them/
A great place to learn html and css
http://www.w3schools.com/
Great overall branding blogger
http://blog.drisgill.com/
Map a network drive to the SharePoint 2013 Master Page Gallery
http://msdn.microsoft.com/en-us/library/jj733519.aspx
How to: Convert an HTML file into a master page in SharePoint Server 2013
http://msdn.microsoft.com/en-us/library/jj822370.aspx
Starter Master Pages for SharePoint 2013 (more advanced branding)
http://startermasterpages.codeplex.com/
Office 365 Preview
http://www.microsoft.com/office/preview/en/office-365-enterprise

___________________________________________________________________________________________________
Enjoy!
Regards
![]()
