One Bastion to access them all (All peered vNets)


azure

Until now, Azure Bastion has been restricted to use within the one vNet where it is connected.
It could not work across vNet peerings or vNets connected to Virtual VAN’s.
If you wanted to use Bastion, you needed to create separate Bastions per vNet. Bastion with regular use comes with a cost of approximately $120/Bastion and Month, $1500/Bastion/Year. (10 vNets = $15.000)
This have now changed. Now, $1500/customer/year is enough (Well worth it!). (10 vNets = $1.500)

Bastion can now work across vNet peering!
https://docs.microsoft.com/en-us/azure/bastion/vnet-peering

Note.
If you have a virtual VAN and your vNets are connected this way, you can add peering in a hub & spoke modell to the vNet where your Bastion is located, this will allow you to use Bastion anyway without disturbing the Virtual VAN functionality.

All you have to do, is create a 2 way peering between the vNet with a Bastion, and the second vNet, and Bastion will show up in the portals ‘Connect’ dialogue.

Bastion2

Bastion1

 
References

https://docs.microsoft.com/en-us/azure/bastion/vnet-peering


___________________________________________________________________________________________________

Enjoy!

Regards

 Thomas Odell Balkeståhl on LinkedIn

Advertisement

Use PowerShell to clear out all local admin accounts


azure

In a true scenario, we got from a pentest report, that to many of our servers had local active accounts that were local administrators. To mitigate this, we planned to  do the following:

  • Delete all accounts except the default administrator (Disable default on 2016)
  • Rename the default to a different name
  • Set a new ‘impossible’ password that nobody knows (45chrs)
  • Leave as-is domain users in the local administrators group

Simple enough if done on one server, via the Windows GUI…but given the circumstanses, having about 100 Windows servers, we decided to do it using PowerShell and to run the script from the Azure portals ‘Run command’ feature (Recommended). Both can however also be used locally on the servers.
What differs in the two versions are, if the servers are running 2016 or later, or 2012R2 or earlier. We had both so we needed two scripts.
(Apologies for the bad formatting in this blog-template)

Windows Server 2016 and later:

# Delete all local admin but default, rename it to Osadmin and reset pwd to 45 chrs random string
$NewAdminName = "OSAdmin"
$Admins = Get-LocalGroupMember -Group 'Administrators' | Select-Object ObjectClass, Name, PrincipalSource | Where-Object {$_.PrincipalSource -eq "Local"} | Select-Object Name
$DefaultAdmin = (Get-WmiObject Win32_UserAccount -filter "LocalAccount=True" | ? {$_.SID -like "S-1-5-21-*-500"}).Name
foreach($Admin in $Admins) {
$UserName = ($Admin.Name).ToString().split("\")[1]
Disable-LocalUser $UserName
If ($UserName -ne $DefaultAdmin) {
Remove-LocalUser $UserName
Write-Host "Removed Admin: $UserName"
}
else {
$Random = ConvertTo-SecureString ((1..45 | ForEach-Object {('abcdefghiklmnoprstuvwxyzABCDEFGHKLMNOPRSTUVWXYZ1234567890!"§$%&/()=?}][{@#*+')[(Get-Random -Maximum ('abcdefghiklmnoprstuvwxyzABCDEFGHKLMNOPRSTUVWXYZ1234567890!"§$%&/()=?}][{@#*+').length)]}) -join "") -AsPlainText -Force
Set-LocalUser -Name $DefaultAdmin -Password $Random
Write-Host "Default Admin password reset to 45 chrs long random string"
if ($DefaultAdmin -ne $NewAdminName){
Rename-LocalUser -Name $DefaultAdmin -NewName $NewAdminName
Write-Host "Renamed default Admin: $UserName to $NewAdminName"
}
}
}
Write-host "Done - Server secured :-)"
 
– – – – – – – – – – – – – – – – – – – –
Pre Windows Server 2016:
 
# Delete all local admin but default, rename it to Osadmin and reset pwd to 45 chrs random string
$NewAdminName = "OSAdmin"
$LocalAdmins = (get-wmiobject -ComputerName $Env:Computername win32_group -filter "name='Administrators' AND LocalAccount='True'").GetRelated("win32_useraccount")

foreach ($LocalUser in $LocalAdmins){
$UserName = $LocalUser.Name
$UserSID = $LocalUser.SID
$userDomain = $LocalUser.Domain
if ($LocalUser.Domain -eq $Env:Computername)
{

If ($userSID -like "S-1-5-21-*-500"){
Write-Host "OK Default: $userName $userDomain" -ForegroundColor Green
If ($UserName -ne $NewAdminName){
$LocalUser.Rename($NewAdminName)
}

$Random = (1..45 | ForEach-Object {('abcdefghiklmnoprstuvwxyzABCDEFGHKLMNOPRSTUVWXYZ1234567890!"§$%&/()=?}][{@#*+')[(Get-Random -Maximum ('abcdefghiklmnoprstuvwxyzABCDEFGHKLMNOPRSTUVWXYZ1234567890!"§$%&/()=?}][{@#*+').length)]}) -join ""
[adsi]$User = "WinNT://./$NewAdminName,user"
$User.SetPassword($Random)
$User.SetInfo()
}
else {Write-Host "DELETE: $userName $userDomain" -ForegroundColor Red
[ADSI]$server = "WinNT://$Env:computername"
$server.delete("user",$UserName)
}
}
else {Write-Host "OK Domain: $userName $userDomain" -ForegroundColor Green}
}
 
Happy PowerShell scripting!
 

References
Not this one


___________________________________________________________________________________________________

Enjoy!

Regards

 Thomas Odell Balkeståhl on LinkedIn

Loopback Check configuration Tool released – free download


Win2012  logo  SharePoint2013Logo70x338

Hi All.

It is here! Free for all! DOWNLOAD

I am happy to announce that the Loopback Check Tool has finally been made available at Codeplex – https://loopbackchecktool.codeplex.com
No more last minute t-shooting the loopback check and ending up disabling it, trying to find the KB or a decent blog post on how to do it.

This Tool takes care of it all for you. Download the exe, put it on your servers, run it to configure the Loopback Check feature simple and easy.

Its simple.
Its small (21kb zipped)
Only click and make it happen
No installation, one single exe that works on most Windows Servers (and clients)
Disable the Loopback check completely (Not recommended)
Enable or Disable the Loopback Check function
Enable it and add excluded URLs (Recommended, now easy to do)

This is a preview image of what the tool looks like

Form

The tool works fine on:

Windows Server 2012
Windows Server 2012 R2
Windows Server 2008 R2
Windows Server 2008
Windows 7
Windows 8
Windows 8.1
And probably a few more…

References:

You receive error 401.1 when you browse a Web site that uses Integrated Authentication and is hosted on IIS 5.1 or a later version
http://support.microsoft.com/kb/896861/en-us

A quick guide to configuring the Loopback check
https://blog.blksthl.com/2013/05/07/a-quick-guide-to-configuring-the-loopback-check/

DisableLoopbackCheck & SharePoint: What every admin and developer should know.
http://www.harbar.net/archive/2009/07/02/disableloopbackcheck-amp-sharepoint-what-every-admin-and-developer-should-know.aspx

Thanks to:

Herakles and Gutke!

Win2012  logo  SharePoint2013Logo70x338

___________________________________________________________________________________________________

Enjoy!

Regards

Twitter | Technet Profile | LinkedIn

Create a bootable Windows Server 2012 R2 installation USB flash drive


2012R2 logo

Hi Windows connoisseurs! (wiki)

(This is essentially a remake of my Create a bootable Windows 8.1 installation USB flash drive post.) The setps are the same so you can easily follow that post or use this slightly updated version.

In this guide I will help you find a way to install Windows Server 2012 R2 quick and easy, from a simple USB flash drive. It’s really easy, but you still need to Think about a few things.
I’ll list them here and if you want, you can follow the step by step guide below.

Quicksteps:

1. Get a USB Flash drive formatted with FAT32, it has to be AT LEAST 8GB! (The Windows Server 2012R2 installation bits will not fit on a 4GB USB drive…)
2. Download and install the Windows 7 USB/DVD Download tool from Microsoft Store here or Codeplex here  (It is an official Microsoft tool, totally wierdly named from the Windows 7 release but still very much valid!)
3. Download or locate a ‘Windows Server 2012 R2’ .iso file and store it locally on your harddrive.
4. Start the Windows 7 USB/DVD Download tool (from startbutton or ‘windows 8/Metro’ style startmenu’?)
5. Complete the steps 1-4
6. Insert the USB flash drive into the powered off PC to install, Power on and boot from USB drive (F9 at HP logo on HP Machines).
7. Install Windows Server as you would normally.
8. Done!

This guide in its entirety works just as well if you replace the Windows Server 2012 R2 .iso file with Windows 8.1, Windows 7, Windows Server 2012 or plain Windows 8 (Windows Server 2008 R2 not verified but willmost likely also work)

Step by step:

1. USB Flash Drive

Prepare a USB flash drive for installation, is has to be at least 8 GB in size and it has to be formatted with FAT32. It does not have to be erased, the tool will do that for you if needed.
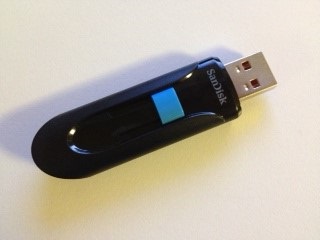
USB

Before

2. Download and install the Windows 7 USB/DVD Download tool from Microsoft Store or Codeplex. The Links are as follows:

http://images2.store.microsoft.com/prod/clustera/framework/w7udt/1.0/en-us/Windows7-USB-DVD-tool.exe
or
http://wudt.codeplex.com

Run the .exe file, you will have to be a local administrator on your machine for it to install properly.

1

Click Next

2

Click Install

3

Click Finish

3. Locate a Windows Server 2012 R2 .iso file. This file should be placed on a local harddrive. It does not matter where you put it, as long as it is on a local HD and it is accessable to you when running the tool, meaning that you have access to where the file is stored in the filesystem.

4. After the installation of the tool has completed, you will suddenly notice this tile:

MetroIcon

You can also just use the search function, in ‘metro mode’ simply type Windows 7 and you will see it and its uninstall app.
Start the tool
Click Ok at the User Account Control popup dialog
The first screen should now look like this:

ChooseISO

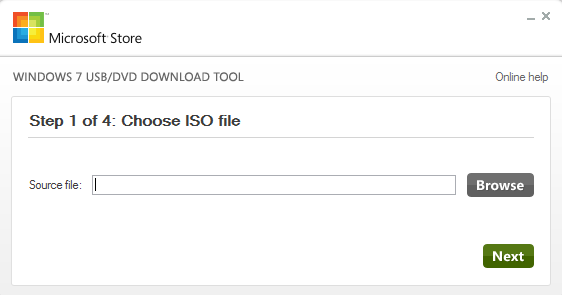
5. Hit the Browse button to locate your Windows Server 2012 R2 installation iso file.

Step1

In my test, I’m using an .iso file downloaded from TechNet Subscriber downloads (soon to be no more)
It does not have to be from TechNet, it can be MSDN or Volume Licensing or really any form of Windows Server 2012 R2 installation iso.

Click ‘Next’

Step2ChooseMedia

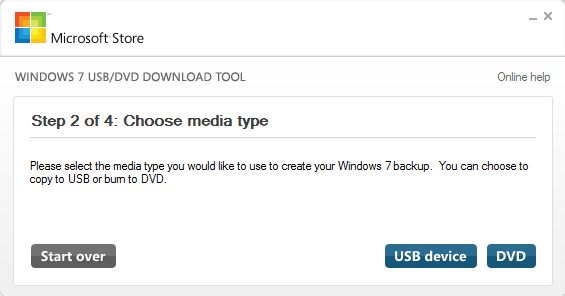
Click on ‘USB device’
If you see the window below, that means that the USB drive is either not plugged in properly, or it has the wrong formatting or insufficient storage or similar. Make sure that you have a USB flash drive that meets: 4GB minimum+FAT32.

Step2ChooseMediaNoUSB

Insert a USB drive that meets the requirements and press the refresh button
Now, click on the ‘Begin copying’ button.

If the USB drive was ok, the copying will begin, but if not, if it still had files still on it, you will see this dialog:

Erase1

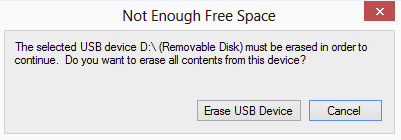
Click Erase to continue

Erase2

Click Yes and the formatting and copying process will begin.

Step4

Step42

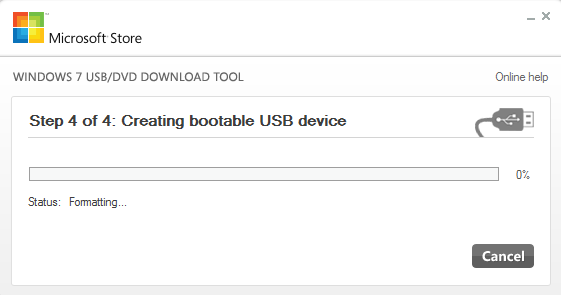
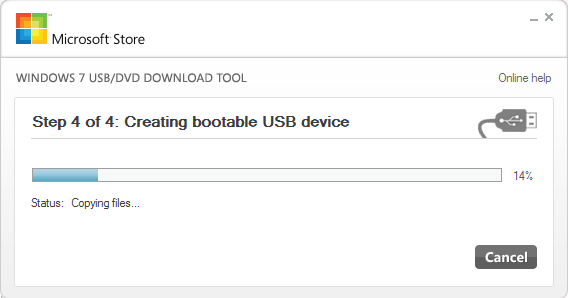
Let it do its thing until it reaches 100%

When it has finished formatting and copying files, you are done.

USB

After!

6. Next step, is to insert the USB drive into the PC you want to install Windows Server 2012 R2 on, Power it off completely and Power on again.
Use BIOS settings to select ‘boot from USB’ or like on a HP machine, hit F9 at the HP logo screen to boot directly from USB.

7. Let the Installation begin! The Windows installation is pretty much standard. A Clean install is described here.  The setup of Windows 8, which is pretty much the same, is described here

8. Done!

References:

Install and Deploy Windows Server 2012 (R2)
http://technet.microsoft.com/en-us/library/hh831620.aspx

Thanks to:

Herakles and Gutke!

2012R2 logo

___________________________________________________________________________________________________

Enjoy!

Regards

Twitter | Technet Profile | LinkedIn