Hi folks, long time no blogging…
A lot has happened in my life since I last updated my blog, I switched jobs so I have a slightly new focus now in my workplace, it has shifted more against SharePoint Online and Office 365. Say what you want about the cloud service named Office 365 but Microsoft is determined…to make it work and piece by piece it gains in value.
One of the great things offered in Office 365 that is also part of the SharePoint Online offering, is Information Rights Management. Thru the use of the other cloud service Azure Rights Management Service (Azure RMS), real IRM protection can be offered to all SharePoint Online customers on the adequate subscription plan. There is still a lot to be done with the service, but as is, it is way, WAY better than nothing, which is what most people have available today in their current solution. IRM or RMS is available to all customers with an onpremises solution as well, but setting RMS up is a challenge for any administrator. In SharePoint online, you will have it up and running in a total of 5 clicks…(depending on what you count as a click…)

IRM – Its all about stopping unwanted access
And what is so great about this IRM, RMS or DRM you may wonder? A beloved child has many names (Old saying in Sweden), well…it is fantastic. IRM offers you the possibility to set a policy on documents (and email messages) that allows you to specify what the user may or may not do with the document, you may also specify exactly what user or grop may or may not read, write, print, download and so on. The really great thing with IRM is that even if you put a document on a USB drive and someone gets their hand on that USB drive, they still need to authenticate against the Azure RMS service before getting any access at all to the document, and even then, what you may do is controlled by the IRM policy. You are in Control of the data even after the document leaves your controlled environment…not bad huh?
So, how is all this greatness achieved you ask? Well, I will not go into all the magic behind the scenes in this post, but I will show you how you can do it yourself, in your current Office 365 tenant or if you prefer, in an evaluation tenant to avoid the risk of affecting your users (which is virtually impossible anyway but just as a precaution…and to make your bosses feel safe).
Lets get started, jump drectly to a section using the links below:
| The complete guide to enabling IRM protection in a SharePoint document library | Jump straigt to the guide, a step by step on how you implement RMS and IRM protection in SharePoint Online. |
| Who gets access to RMS, license plans listed | Get the list of what subscription plan includes RMS and what does not. |
| What works and what doesn’t? | The cmplete list of supported OS’s and Applications that support Azure RMS and the ones that do no yet support Azure RMS. |
| About the IRM/RMS technology – How does it work, what does it do? | The functionality explained. |
| References/Links – Find the information online | Link to when you get all the info you need in the sometimes difficult Microsoft TechNet way… |
–
–
The complete guide to enabling IRM protection in a SharePoint document library
This is done in four steps:
– Activate Azure RMS in the Office 365 administration portal.
– Activate RMS in SharePoint online
– Create and set a IRM policy in a document library
– Quickly verify your Information Rights Management
Step 1. Activate Azure RMS in the Office 365 administration portal.
1.1 Log on to your Offcie 365 tenant as a global administrator, go to the Office 365 admin center. You will find the shortcut in the admin dropdown.

1.2 The Office 365 admin center
1.3 Now select on the lefthand menu, service settings

1.4 In the top menu select ‘rights management’

1.5 Click on the link to Manage your ‘Azure Rights Management’

1.6 This is where you leave your Office 365 tenant, note the URL you now se in your browsers address field:

1.7 In Azure RMS you will be met by this text saying that yiou have not activated Rights Management yet.

1.8 In order to activate the RM feature, click on ‘activate’…DUH! Then click on ‘activate’ again…if you are absolutely sure…

1.9 Wait for it….

1.10 Now you should see this, A nice green checkmark telling you that Rights Managemen has been activated.
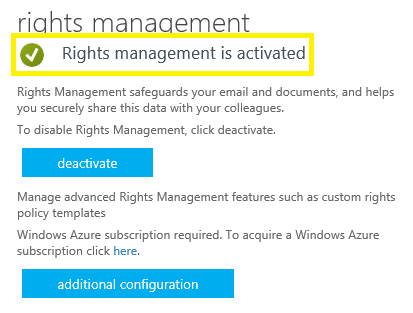
1.11 Done! Now you can move on with activating Rights Management in your SharePoint Online admin portal. The steps you have now taken makes the RMS service available in all parts of your Office 365 tenant, like in Exchange, SharePoint (and Lync).
(As you can see, you can lso make some additional configurations of RMS, for example you can create your own custom policys, fr some reason though, you are required to sign up for a separate Azure RMS suscription for this…the link to where you sign up is added to the page to make things simpler for you)
Step 2. Activate RMS in SharePoint online
2.1 Go to the SharePoint administration portal. Find the shortcut in the Admin dropdown.

2.2 In the lefthand pane, select Settings.

2.3 Scroll downto the section named ‘Information Rights Management (IRM)’

2.4 Under Information Rights Management (IRM), on the right side, select ‘Use the IRM service specified in your configuration’

2.5 Click on the ‘Refresh IRM Settings’ button. (Buttons…welll…maybe they are touch buttons?)
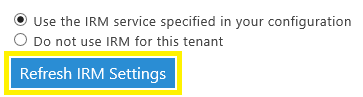
2.6 In ashort while, you will see the text ‘We successfully refreshed your settings’ below the button.

2.7 Done! This means that IRM functionality has been enabled in your SharePoint Online tenant and the IRM settings will now be available in SharePoint.
Note! If you have not previously activated IRM in your Office 365 admin portal, then you will see this massage instead: If that is the case, simply go back to Step 1 in this guide and activate IRM in Office 365 first. If that is the case, simply go back to Step 1 in this guide and activate IRM in Office 365 first. |
Step 3. Create and set a IRM policy in a document library
3.1 Go to a site in your SharePoint Online site collection of choice (can be the rootsite or a subsite), go to a document library (default is probably ‘Documents’).
Now, click on the ‘Library’ tab.

3.2 To the right in the ribbon, click on ‘Library Settings’

3.3 Click on ‘Information Rights Management’

3.4 This is the Information Rights settings for the current Document Library, what you change here will only affect this document library and the documents in it. Remember though, that what you change here will affect ALL documents in this library, in all folders, of all types. By default, IRM is disabled and has no affect at all.

3.5 What you see here, is only the name and the description and the activate button. In order to see more of the settings, click on SHOW OPTIONS. This offers all the settings that are currently available for a document library in SharePoint Online.
Start now by giving your policy a name and type in a description, this is what will be shown to the user, so its better to use a good explainatory description.

3.6 Click on ‘SHOW OPTIONS’. Configure what the policy is and what is allowed and what isn’t. For the sake of easily verifying the functionality, only configure that the document cannot be opened in a browser. In the first section, ‘Set additional IRM library settings’ check the box to prevent the documents from opening in the browser.

3.7 The two other sections has even more options, ‘Configure document access rights’…
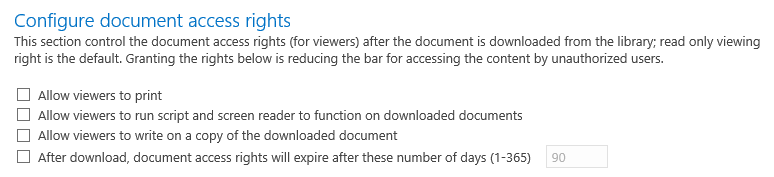
3.8 …and ‘Set group protection and credentials interval’.

3.9 When you have configurd the policy like you want it, hit Ok.

3.10 Done! All document in your library are now protected uing the IRM policy you configred. THat IRM is used cannot be seen unless you have access to the IRM setting in the Library Settings. What a regular user can see, is the effect of the policy alone.
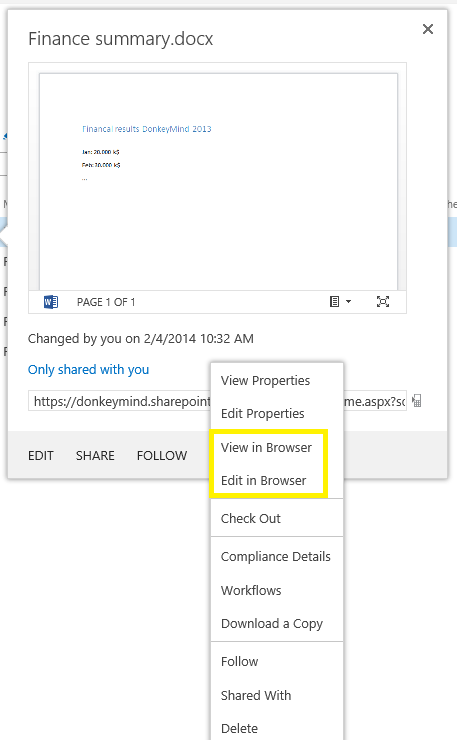
3.11 Whithout the policy activated you get a preview of the document(offered by Office Web Apps) and the option to view and edit in browser like below:

3.12 When the policy has been activated, you do not get any preview and the view and edit in browser options are gone.


3.13 You are now done, your document library is IRM protected using Azure Rights Management Service.
Step 4. Quickly verify your Information Rights Management
4.1 Upload a Word document to the document library. (Your document is now IRM protected)
4.2 Click on Edit, you should be prompted to download the document. Cancel the dialog.
4.3 Click on the three dots, you should see a notice that a preview is prevented by RMS.
4.4 You will also notice that the dropdown many does not offer any choice to open in browser or preview in browser.
4.5 Done!
| Note: A good bestpractise is to Always verify that your IRM protection policy is activated and works as expected. Some settings must be tested using a Office client application andsome can be tested onin like in this scnario. |
–
–
Who gets access to RMS, license plans listed
| Licensing option | Office 365 Small Business | Office 365 Small Business Premium | Office 365 Midsize Business | Office 365 Enterprise E2Office 365 Education A2 | Office 365 Enterprise E3Office 365 Education A3Office 365 Government G3 | Office 365 Enterprise E4Office 365 Education A4Office 365 Government G4 | Office 365 Enterprise K1 | SharePoint Plan 2 | Exchange Online Plan 2 |
|---|---|---|---|---|---|---|---|---|---|
| Information Rights Protection (IRM) | No | No | No | No | Yes | Yes | No | No | No |
Like you can see, far from all license plans include RMS.
In addition to the Ofice 35 subscptions that include RMS, there is also a RMS for individuals subscription that will allow a user outside of the organization to open and access IRM protected documents from an organizaton that uses IRM protection using RMS.
| Note: If you have a subscription plan that does not include RMS, like a Office 65 E1 or E2, then you can get the RMS functionality as an add-on from Micosoft (Azure RMS Standalone). Talk to you account represenative or your LAR/license vendor. This optio cos a lot less than to upgrade to a E3 plan simply for the RMS functionalty. |
–
–
What works and what doesn’t?
So, we wat to use RMS and IRM protection, but what is supported, can we use it whereever we want and whenever we want? No, you can’t…
There are some things that work and sometings that don’t work, I have tried to list them all blow, as time goes by, Micrsoft will most likely subtract from the No list and add to the Yes list *.
| Implementation | Supports Azure RMS |
| Operating Systems | |
| Windows 7 Professional SP0 | Yes |
| Windows 7 Enterprise SP0 | Yes |
| Windows 7 Ultimate SP0 | Yes |
| Windows 7 Professional SP1 | Yes |
| Windows 7 Enterprise SP1 | Yes |
| Windows 7 Ultimate SP1 | Yes |
| Windows 8 Pro | Yes |
| Windows 8 Enterprise | Yes |
| Windows 8.1 Pro | Yes |
| Windows 8.1 Enterprise | Yes |
| Mac OS X (minimum 10.7, Lion) | Yes |
| Mobile Devices | |
| Windows Phone 8 | Yes |
| Android 4.0.3 | Yes |
| iOS 6.0 | Yes |
| Windows 8 RT | Yes |
| Windows 8.1 RT | Yes |
| Applications | |
| Office 365 | |
| Office Professional Plus 2013 | Yes |
| Office Professional 2010 (With RMS addon) | Yes |
| Microsoft Office for Mac 2011 | No |
| Microsoft Office for iPad | No |
| Microsoft OneDrive (formerly SkyDrive) | No |
| Microsoft OneDrive for Business (formerly SkyDrive Pro) | No (!) |
| Sharing Applications | |
| Minimum OS version of Windows 7 Service Pack 1 | Yes |
| For Mac OS | No |
| On premise Servers | |
| Exchange 2013 | Yes |
| Exchange 2010 | Yes |
| SharePoint Server 2013 | Yes |
| SharePoint Server 2010 | Yes |
| Windows Server 2012 (FCI) | Yes |
| Windows Server 2012 R2 (FCI) | Yes |
* I asume that all else not listed here does not support Azure RMS.
The RMS connector is supported on Windows Server 2012 R2, Windows Server 2012, and Windows Server 2008 R2.
–
–
About the IRM/RMS technology – How does it work, what does it do?
(This section is a direct quote from Microsoft, they actually have a pretty good short and to the point explaination here.)
What is Azure Rights Management:
Azure Rights Management lets you encrypt and assign usage restrictions to content when your organization subscribes to Microsoft online services. Rights Management helps protect content that is created and exchanged by using Microsoft Office as well as other applications or services that have been updated to integrate with the Rights Management service. By implementing a cloud-based rights management service, Rights Management provides an alternative for organizations seeking information protection capabilities within Microsoft Office 365.
Rights management provides the following:
Safeguards sensitive information
Applications and services such as Microsoft Office 2010 and Microsoft Office Professional Plus 2013, SharePoint Online and Microsoft Exchange Online are enabled to help safeguard sensitive information. Users and administrators can define who can open, modify, print, forward, or take other actions with the information. Organizations are provided usage policy templates such as “Company Confidential – Read Only” that can be applied directly to the information.
Provides persistent protection
Rights Management persists protection of file data when at rest and in motion. Once information is locked, only trusted entities that were granted usage rights under the specified conditions (if any) can unlock or decrypt the information.
Supports closer management of usage rights and conditions
Organizations and individuals can assign usage rights and conditions using rights management that define how a specific trusted entity can use rights-protected content. Examples of usage rights are permission to read, copy, print, save, forward, and edit. Usage rights can be accompanied by conditions, such as when those rights expire.
Integrates rights management with Office 365
Rights Management is integrated with SharePoint Online, Exchange Online, and other Office 2010 and Office Professional Plus 2013 applications to provide rights management functionality across the Microsoft Office suite.
–
–
References
Office 365 Information Protection using Azure Rights Management
http://blogs.technet.com/b/rms/archive/2013/11/11/office-365-information-protection-using-azure-rights-management.aspx
Set up Information Rights Management (IRM) in SharePoint admin center
http://office.microsoft.com/en-us/office365-sharepoint-online-enterprise-help/set-up-information-rights-management-irm-in-sharepoint-admin-center-HA102895193.aspx
Azure Rights Management
http://technet.microsoft.com/en-us/library/jj585024.aspx
Administering Azure Rights Management by Using Windows PowerShell
http://technet.microsoft.com/en-us/library/jj585027.aspx
Requirements for Azure Rights Management
http://technet.microsoft.com/en-us/library/dn655136.aspx
Cloud subscriptions that support Azure RMS
http://technet.microsoft.com/en-us/library/dn655136.aspx#BKMK_SupportedSubscriptions

_________________________________________________________
Enjoy!
Regards
![]()
